
Steps Toward Lower Energy Costs and Better Building Performance
With support from the Investments in Forest Industry Transformation (IFIT) program and the Smart Sustainable Resilient Infrastructure Association (SSRIA), HSS Design Build is developing a groundbreaking retrofit system and implementing it through to pilot projects in the Bow Valley—helping pave the way toward a more energy-efficient, low-carbon future.
Low Carbon Prefabricated Exterior Energy Retrofit (PEER) panels are engineered to significantly reduce a home’s energy consumption, resulting in lower utility bills and a more comfortable, consistent indoor climate year-round. The panels are manufactured off-site and delivered for installation onto the exterior of the home. This approach accelerates construction timelines, reduces on-site waste, and minimizes disruption—allowing homeowners to remain in their homes during the retrofit process.
While research and case study is ongoing and will be published in the future, we have developed a preliminary step-by-step guide outlining the key stages involved in improving a home’s overall energy performance and transforming an existing house into a low-carbon building using PEER panels. This process has been distilled into seven core steps, outlined below.
Step 1: EnerGuide Home Evaluation
A certified energy advisor will inspect the house - collecting data on the building envelope and mechanical equipment - and perform a blower door test to measure airtightness.
Using this information, the energy advisor builds an energy model that estimates how much energy the house would use under standard operating conditions. Once complete, the homeowner receives a set of documents identifying targeted interventions to improve energy efficiency and comfort.
One of these documents is an EnerGuide Rating System Label, which shows:
How the home’s energy use compares to a new code-built home.
What systems consume the most energy (typically space heating, followed by cooling).
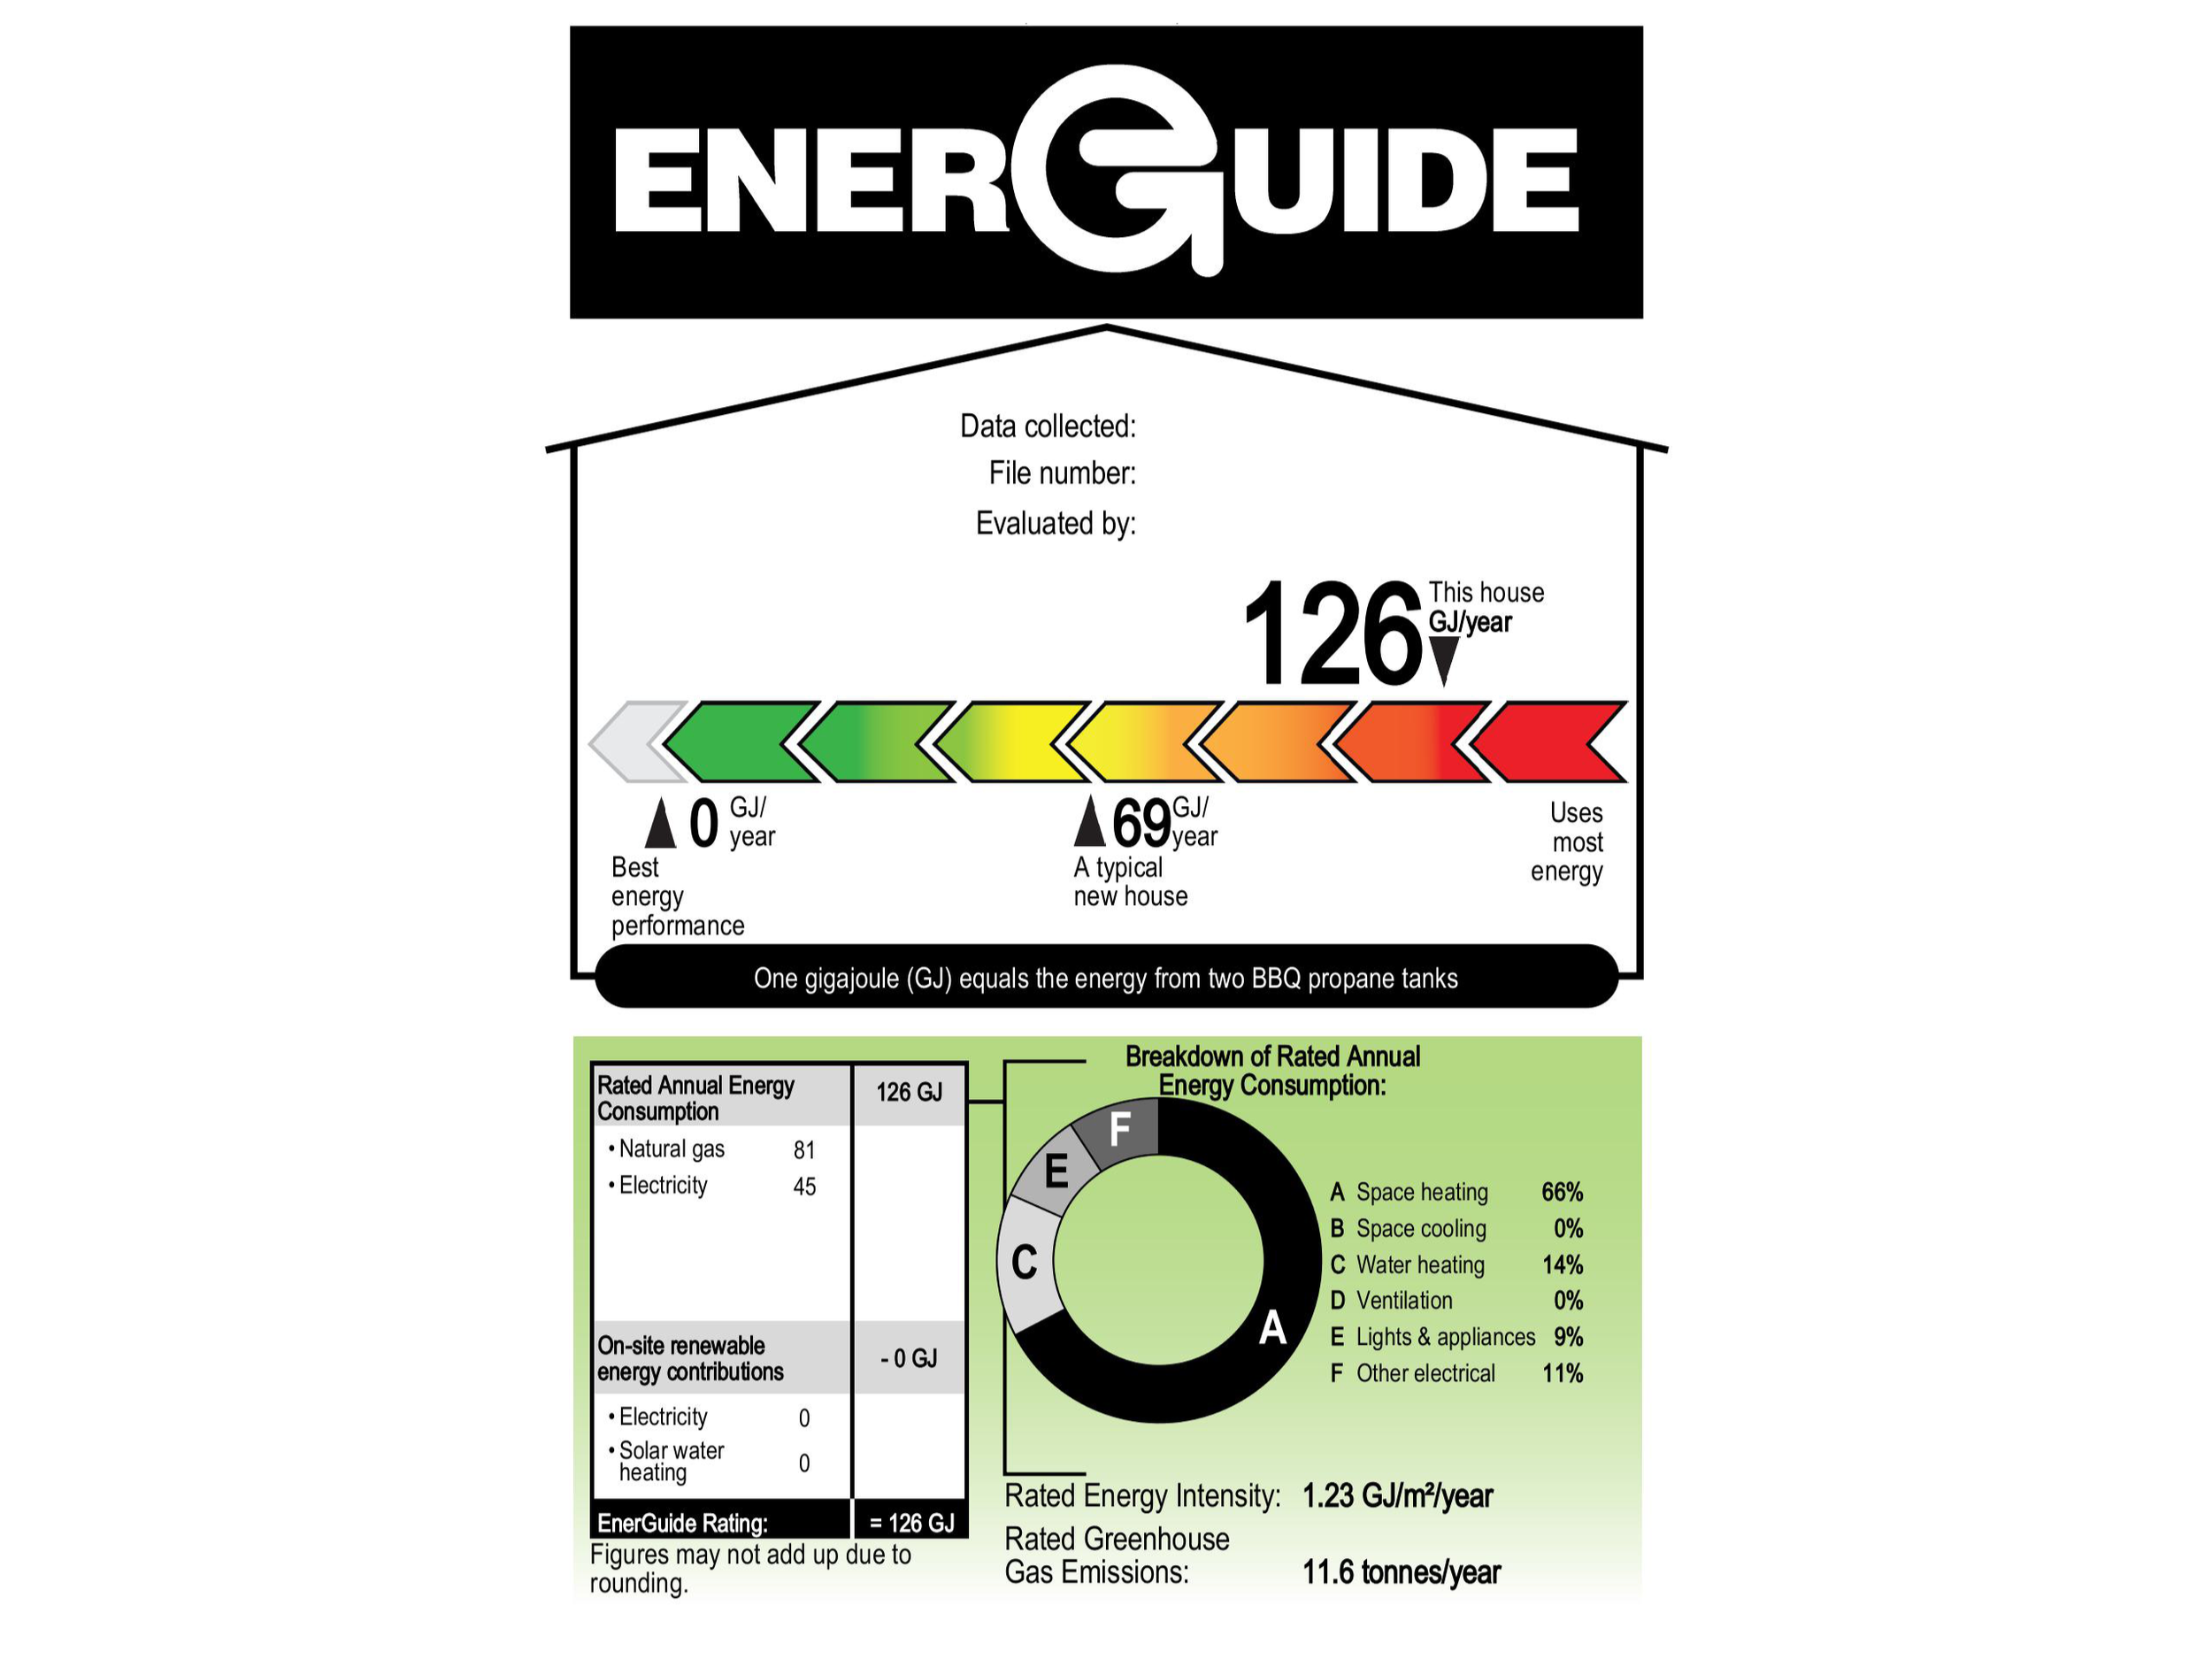
Pictured: EnerGuide Rating System Label
Homeowners will also receive a Homeowner Information Sheet, which shows where the house is losing heat - often through windows, walls, and air leakage.

Pictured: Homeowner Information Sheet
Replacing inefficient windows, improving insulation, and reducing air leakage are key strategies for reducing energy use - making PEER an ideal solution.
A completed EnerGuide evaluation may also make the homeowner eligible for grants and loans to help offset the cost of the retrofit.
Step 2: Digital Scanning of the House for Panel Design
Because PEER panels are custom-fabricated off-site, an extremely accurate 3D model of the house is required. We use a total station 3D scanner to capture the exterior of the building with precision - accurate within 3 mm.
This ensures the panels fit snugly around the existing home and that new window rough openings align perfectly with the originals.
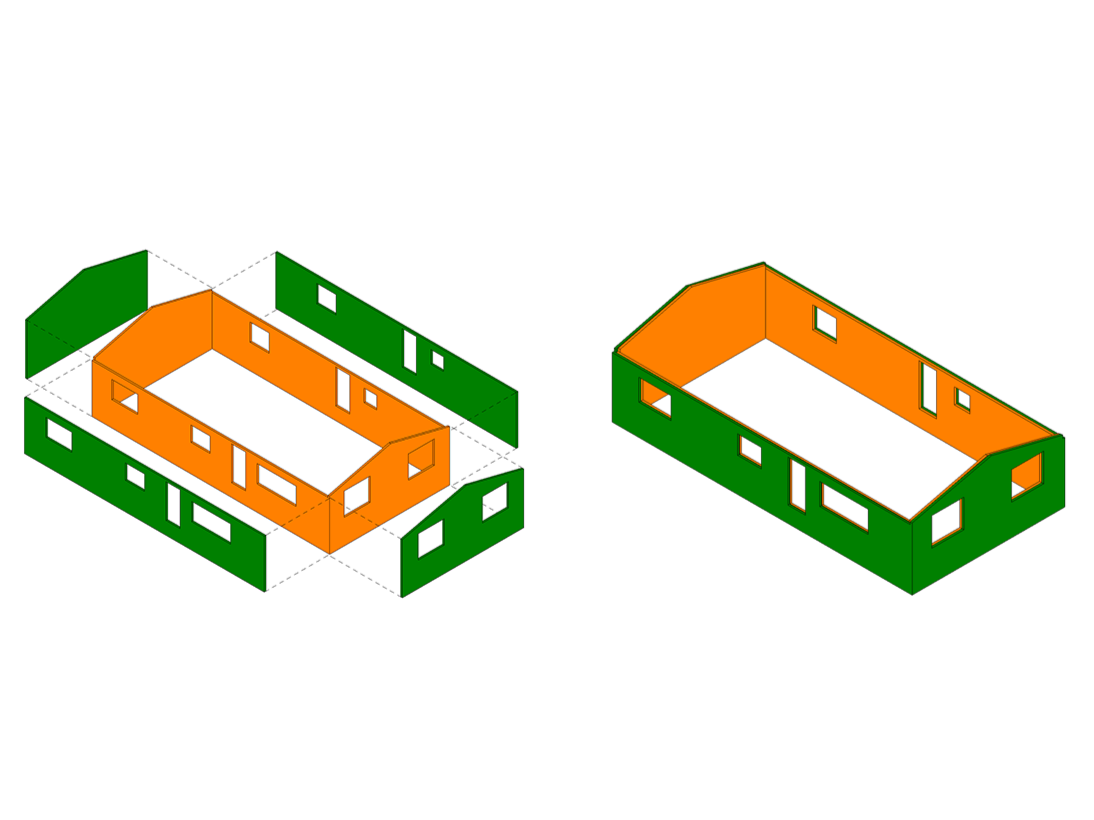
Pictured: 3D model of the PEER panels that will be applied to the existing envelope
Step 3: Prefabricating the PEER Panels
Prefabricating the panels off-site provides several advantages:
Faster, more efficient panel production.
Less construction waste.
Shorter timelines and less disruption for homeowners.
We use rigid wood fibre insulation boards - low-carbon building material. These are paired with a rainscreen cladding system, which:
Increases drying potential, durability, and lifespan.
Uses organic renewable wood based materials that sequester carbon and reduce embodied carbon.
Once ready, panels are loaded onto a trailer for delivery—often an entire house worth of panels fits on a single trailer.
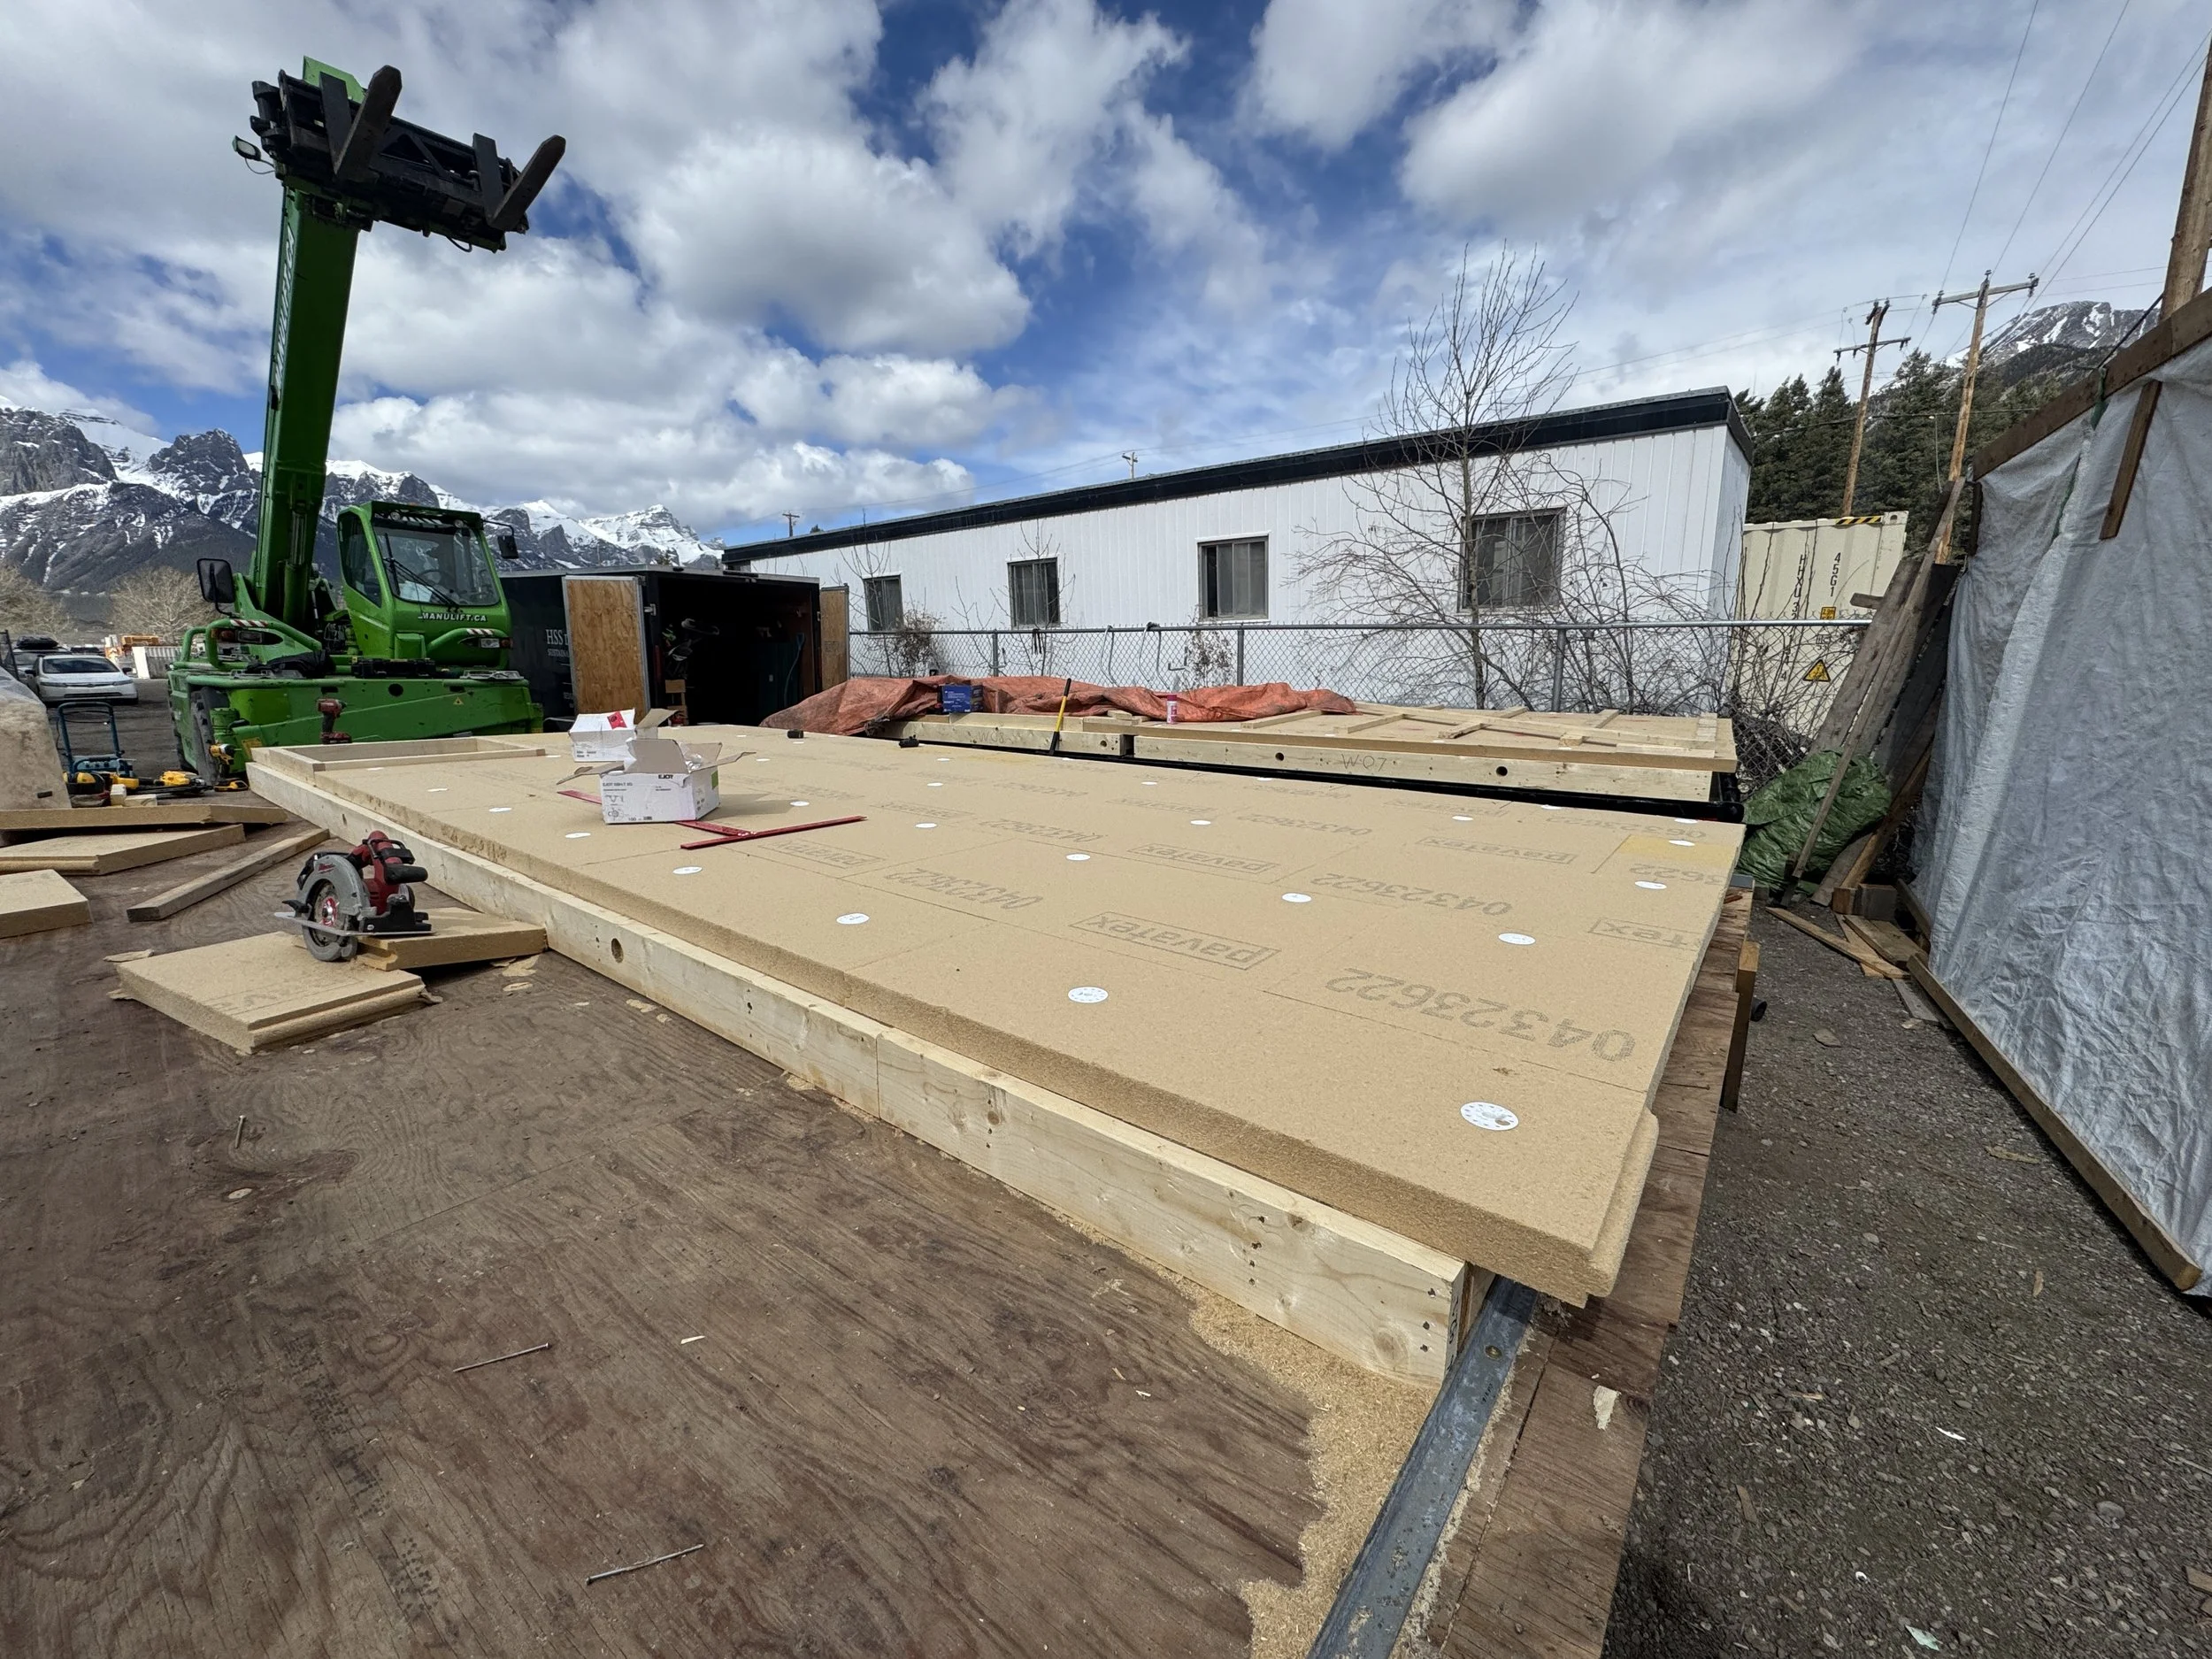
Pictured: Prefabricating PEER panels in the off-site facility
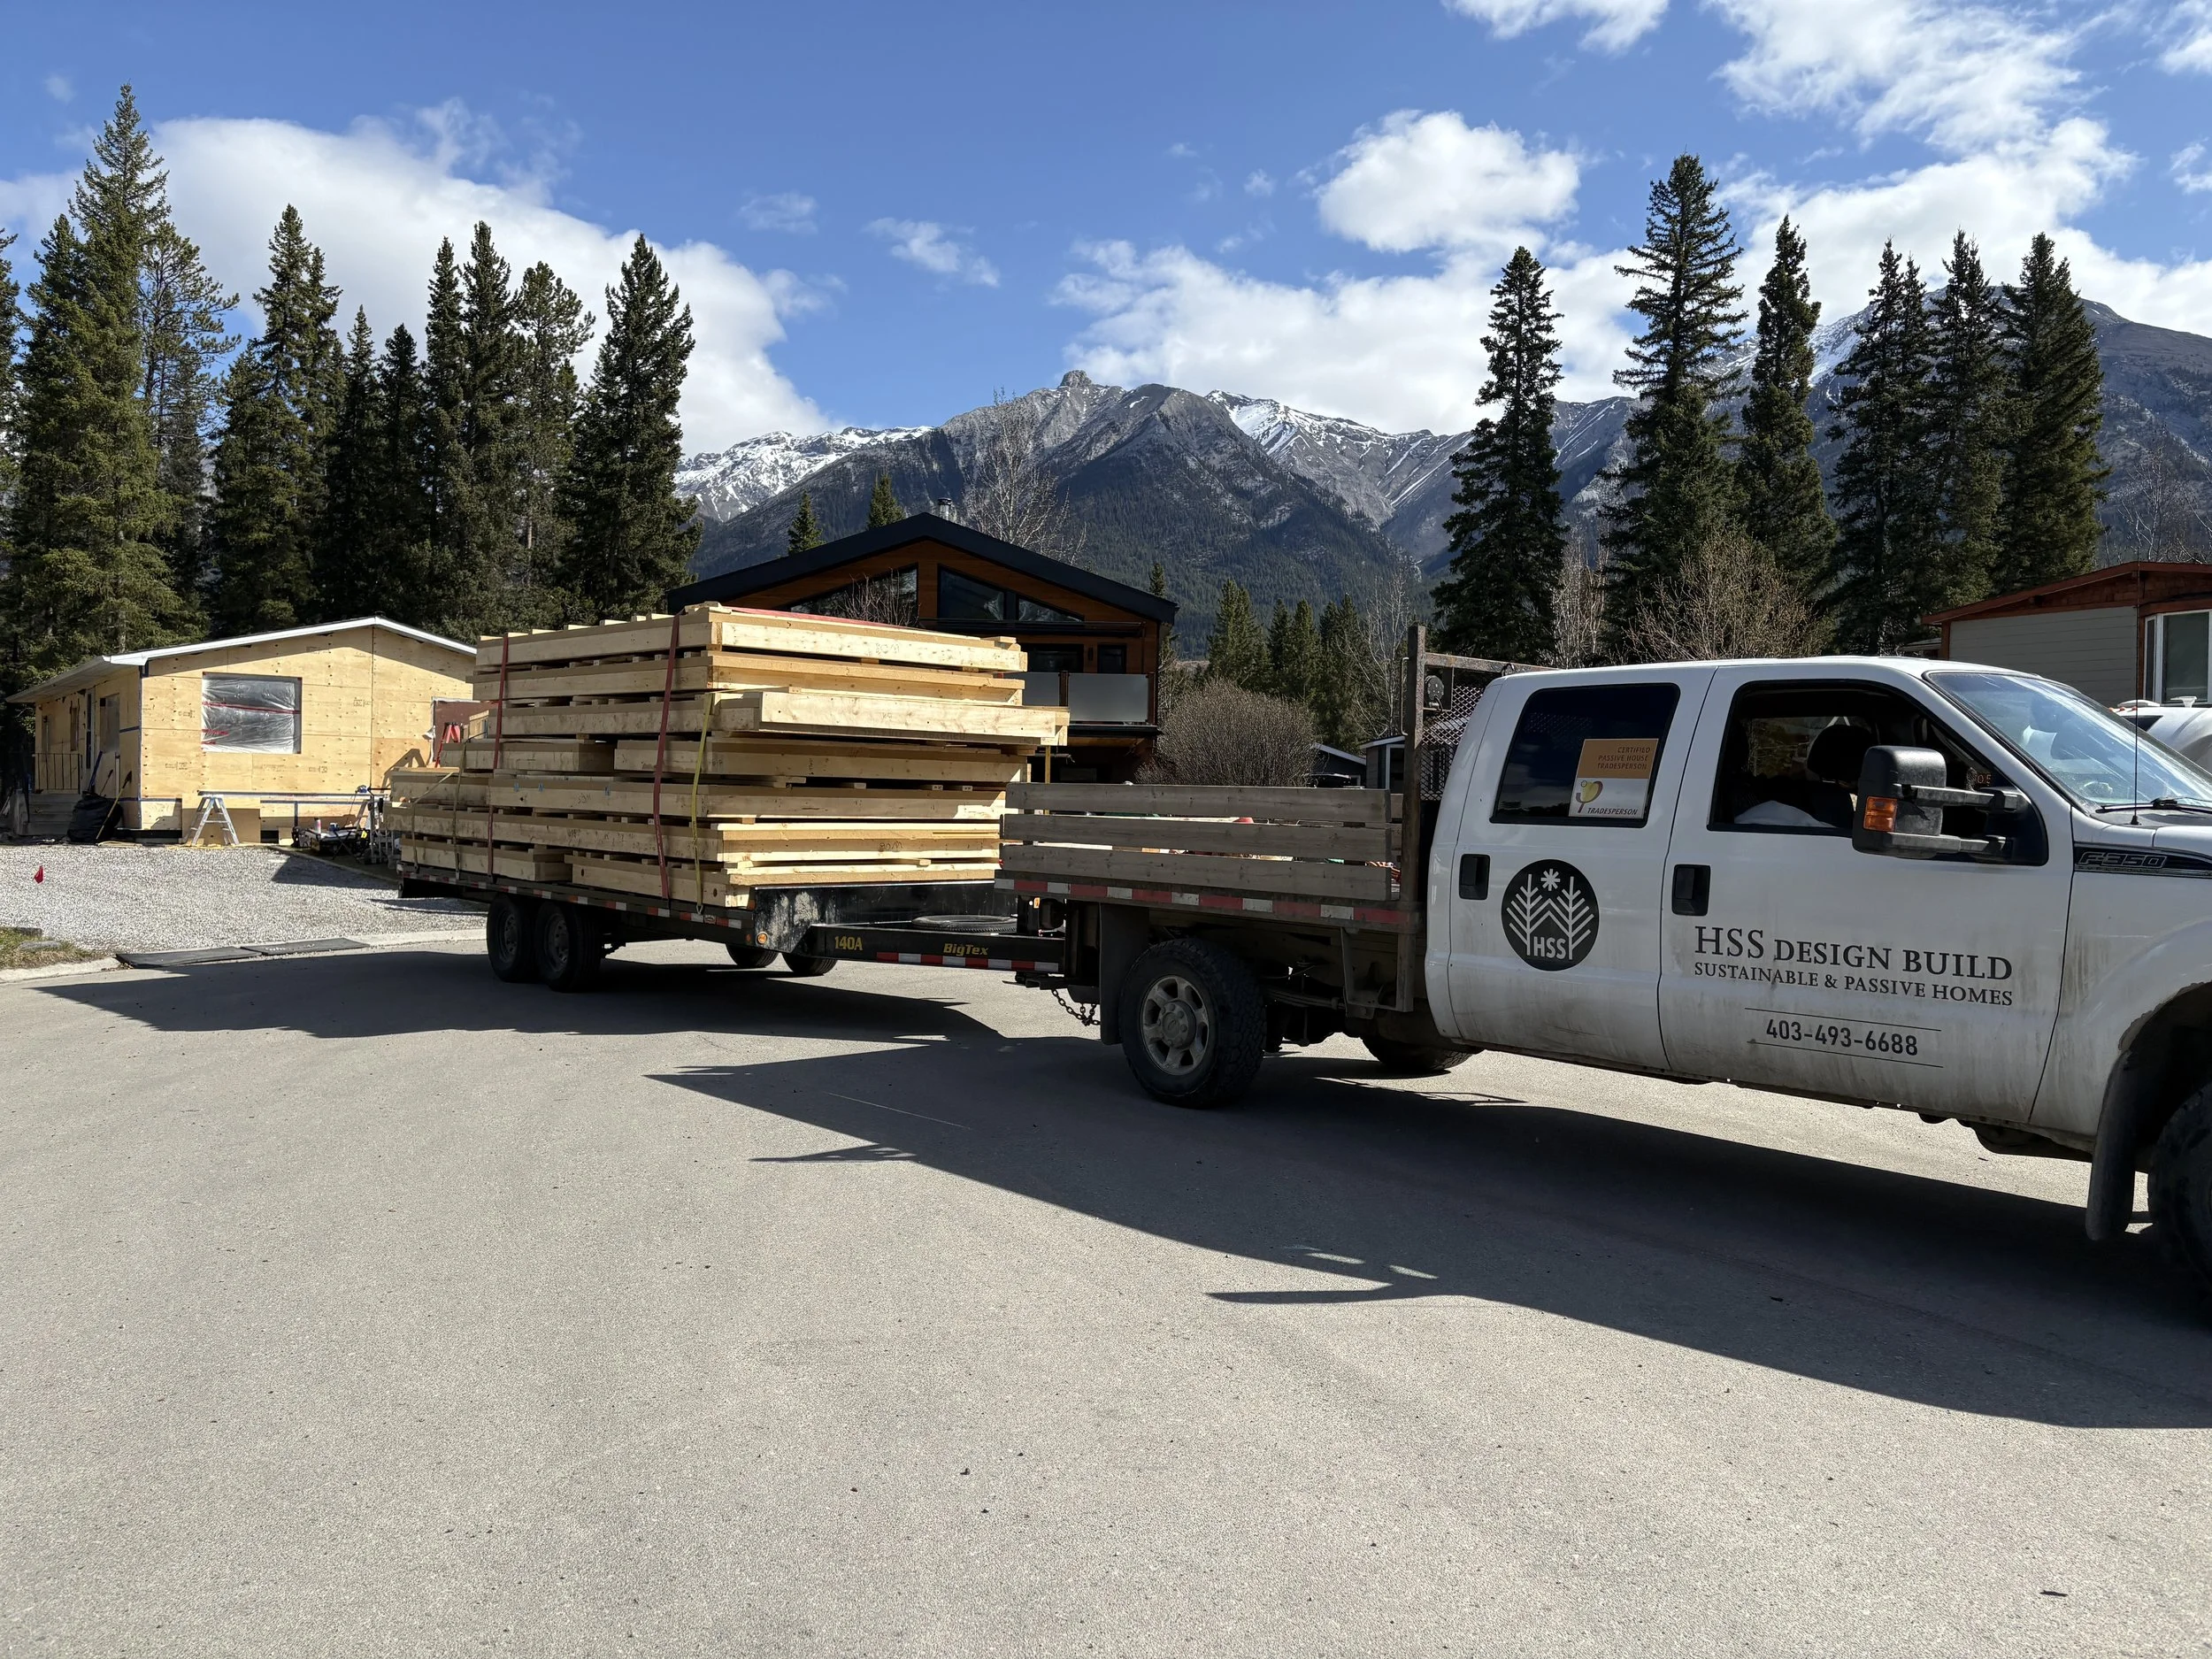
Pictured: Transporting PEER panels
Step 4: Preparing the House for Panel Installation
Several prep steps must be completed on-site before the panels arrive:
Remove old siding and inspect the structure.
Identify and repair any issues (e.g. air tightness)
Reinforce structural sheathing as needed.
Remove parging or cladding on the foundation and install brackets to support the weight of the panels.
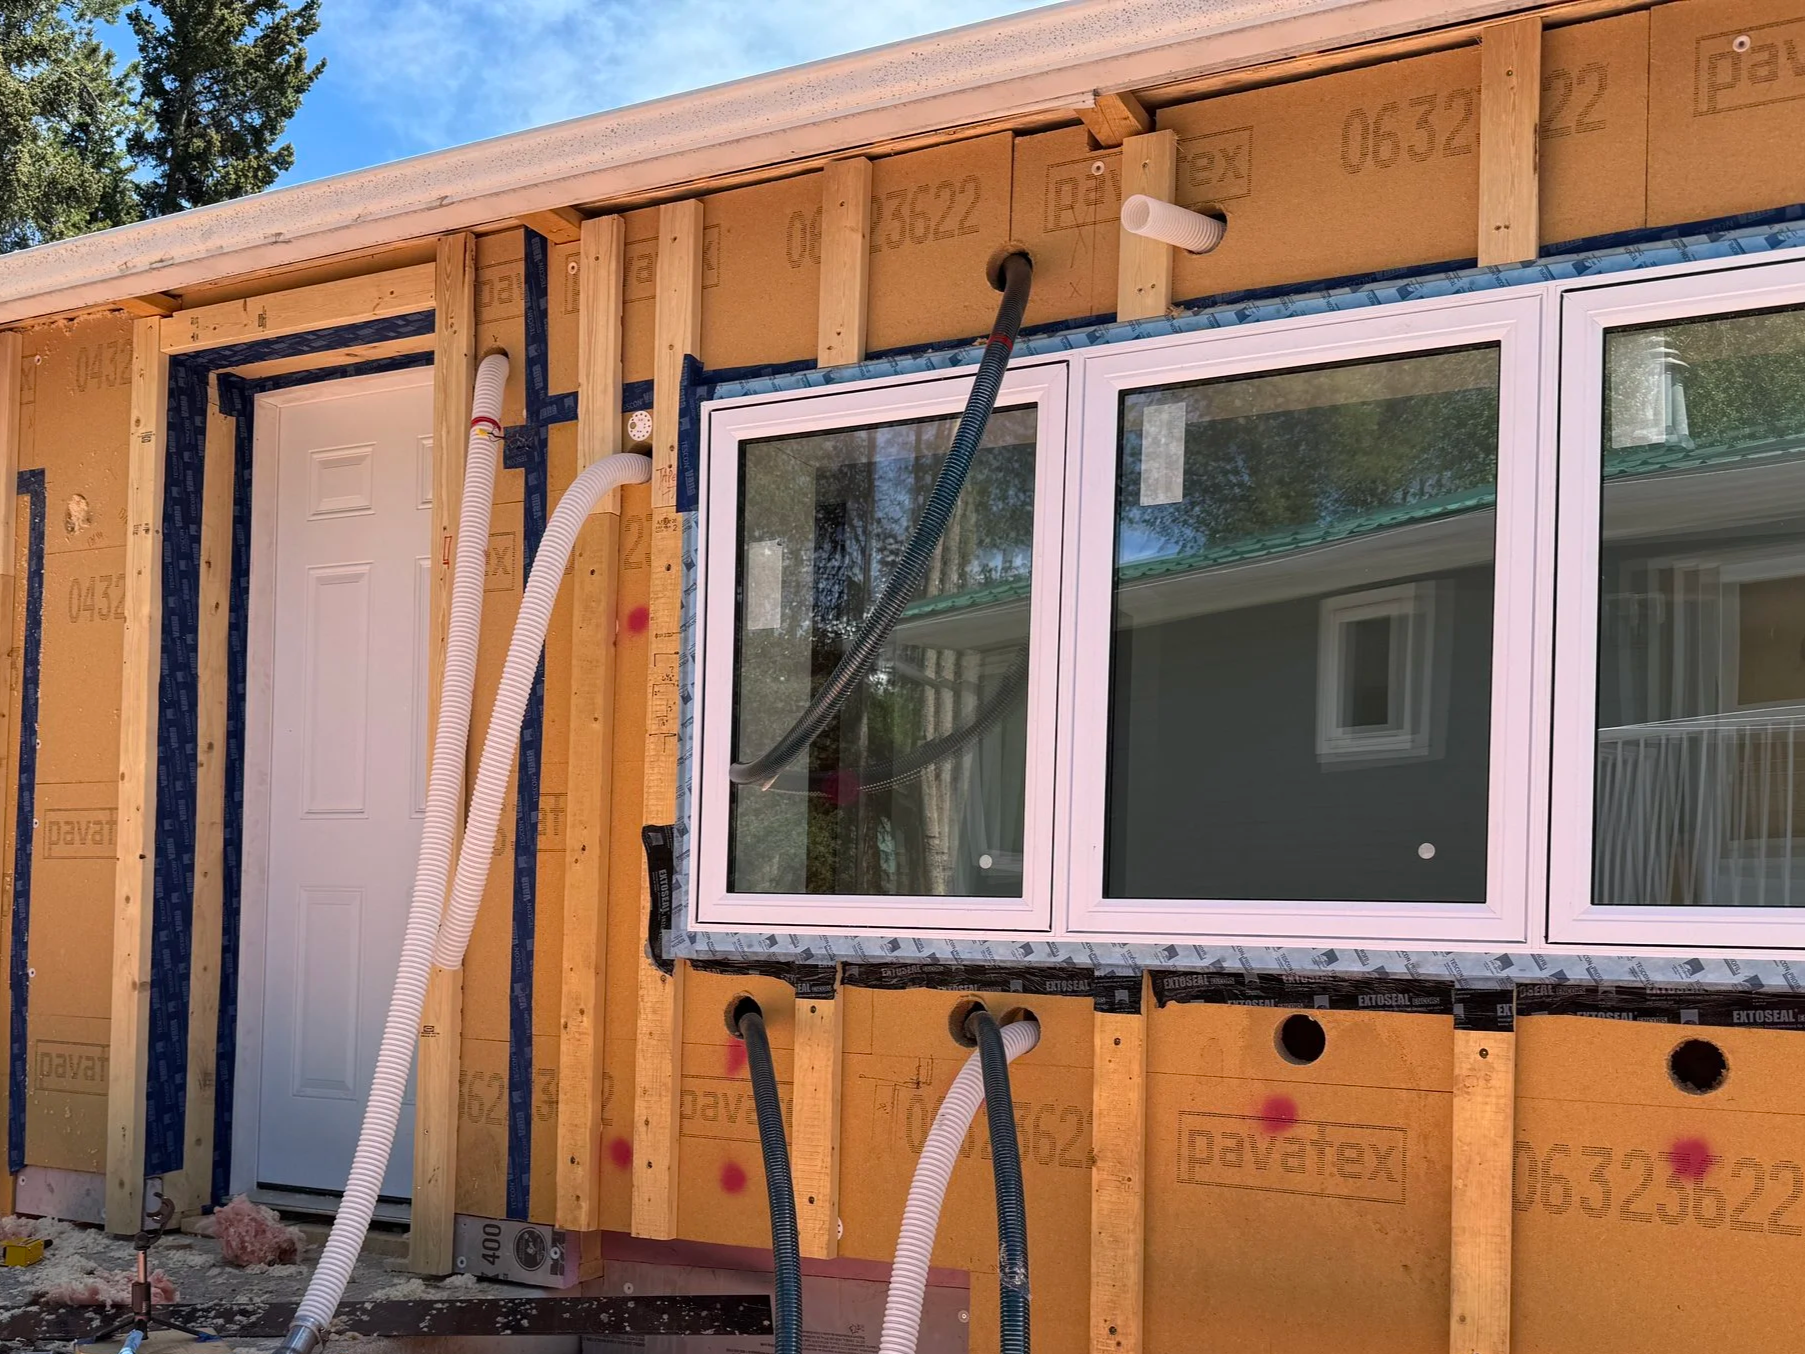
This is also the point when old, inefficient windows can be removed and replaced. Homeowners may choose to install larger windows to increase daylight.
Sheathing seams taped to improve air tightness. While the original air barrier (usually behind drywall) can’t be replaced, taping and blown-in fibre insulation will reduce air leakage through the walls.
When new windows are installed into the PEER panels, they’re properly sealed into the air barrier—eliminating leakage around the frames.
Step 5: Delivering and Installing the PEER Panels
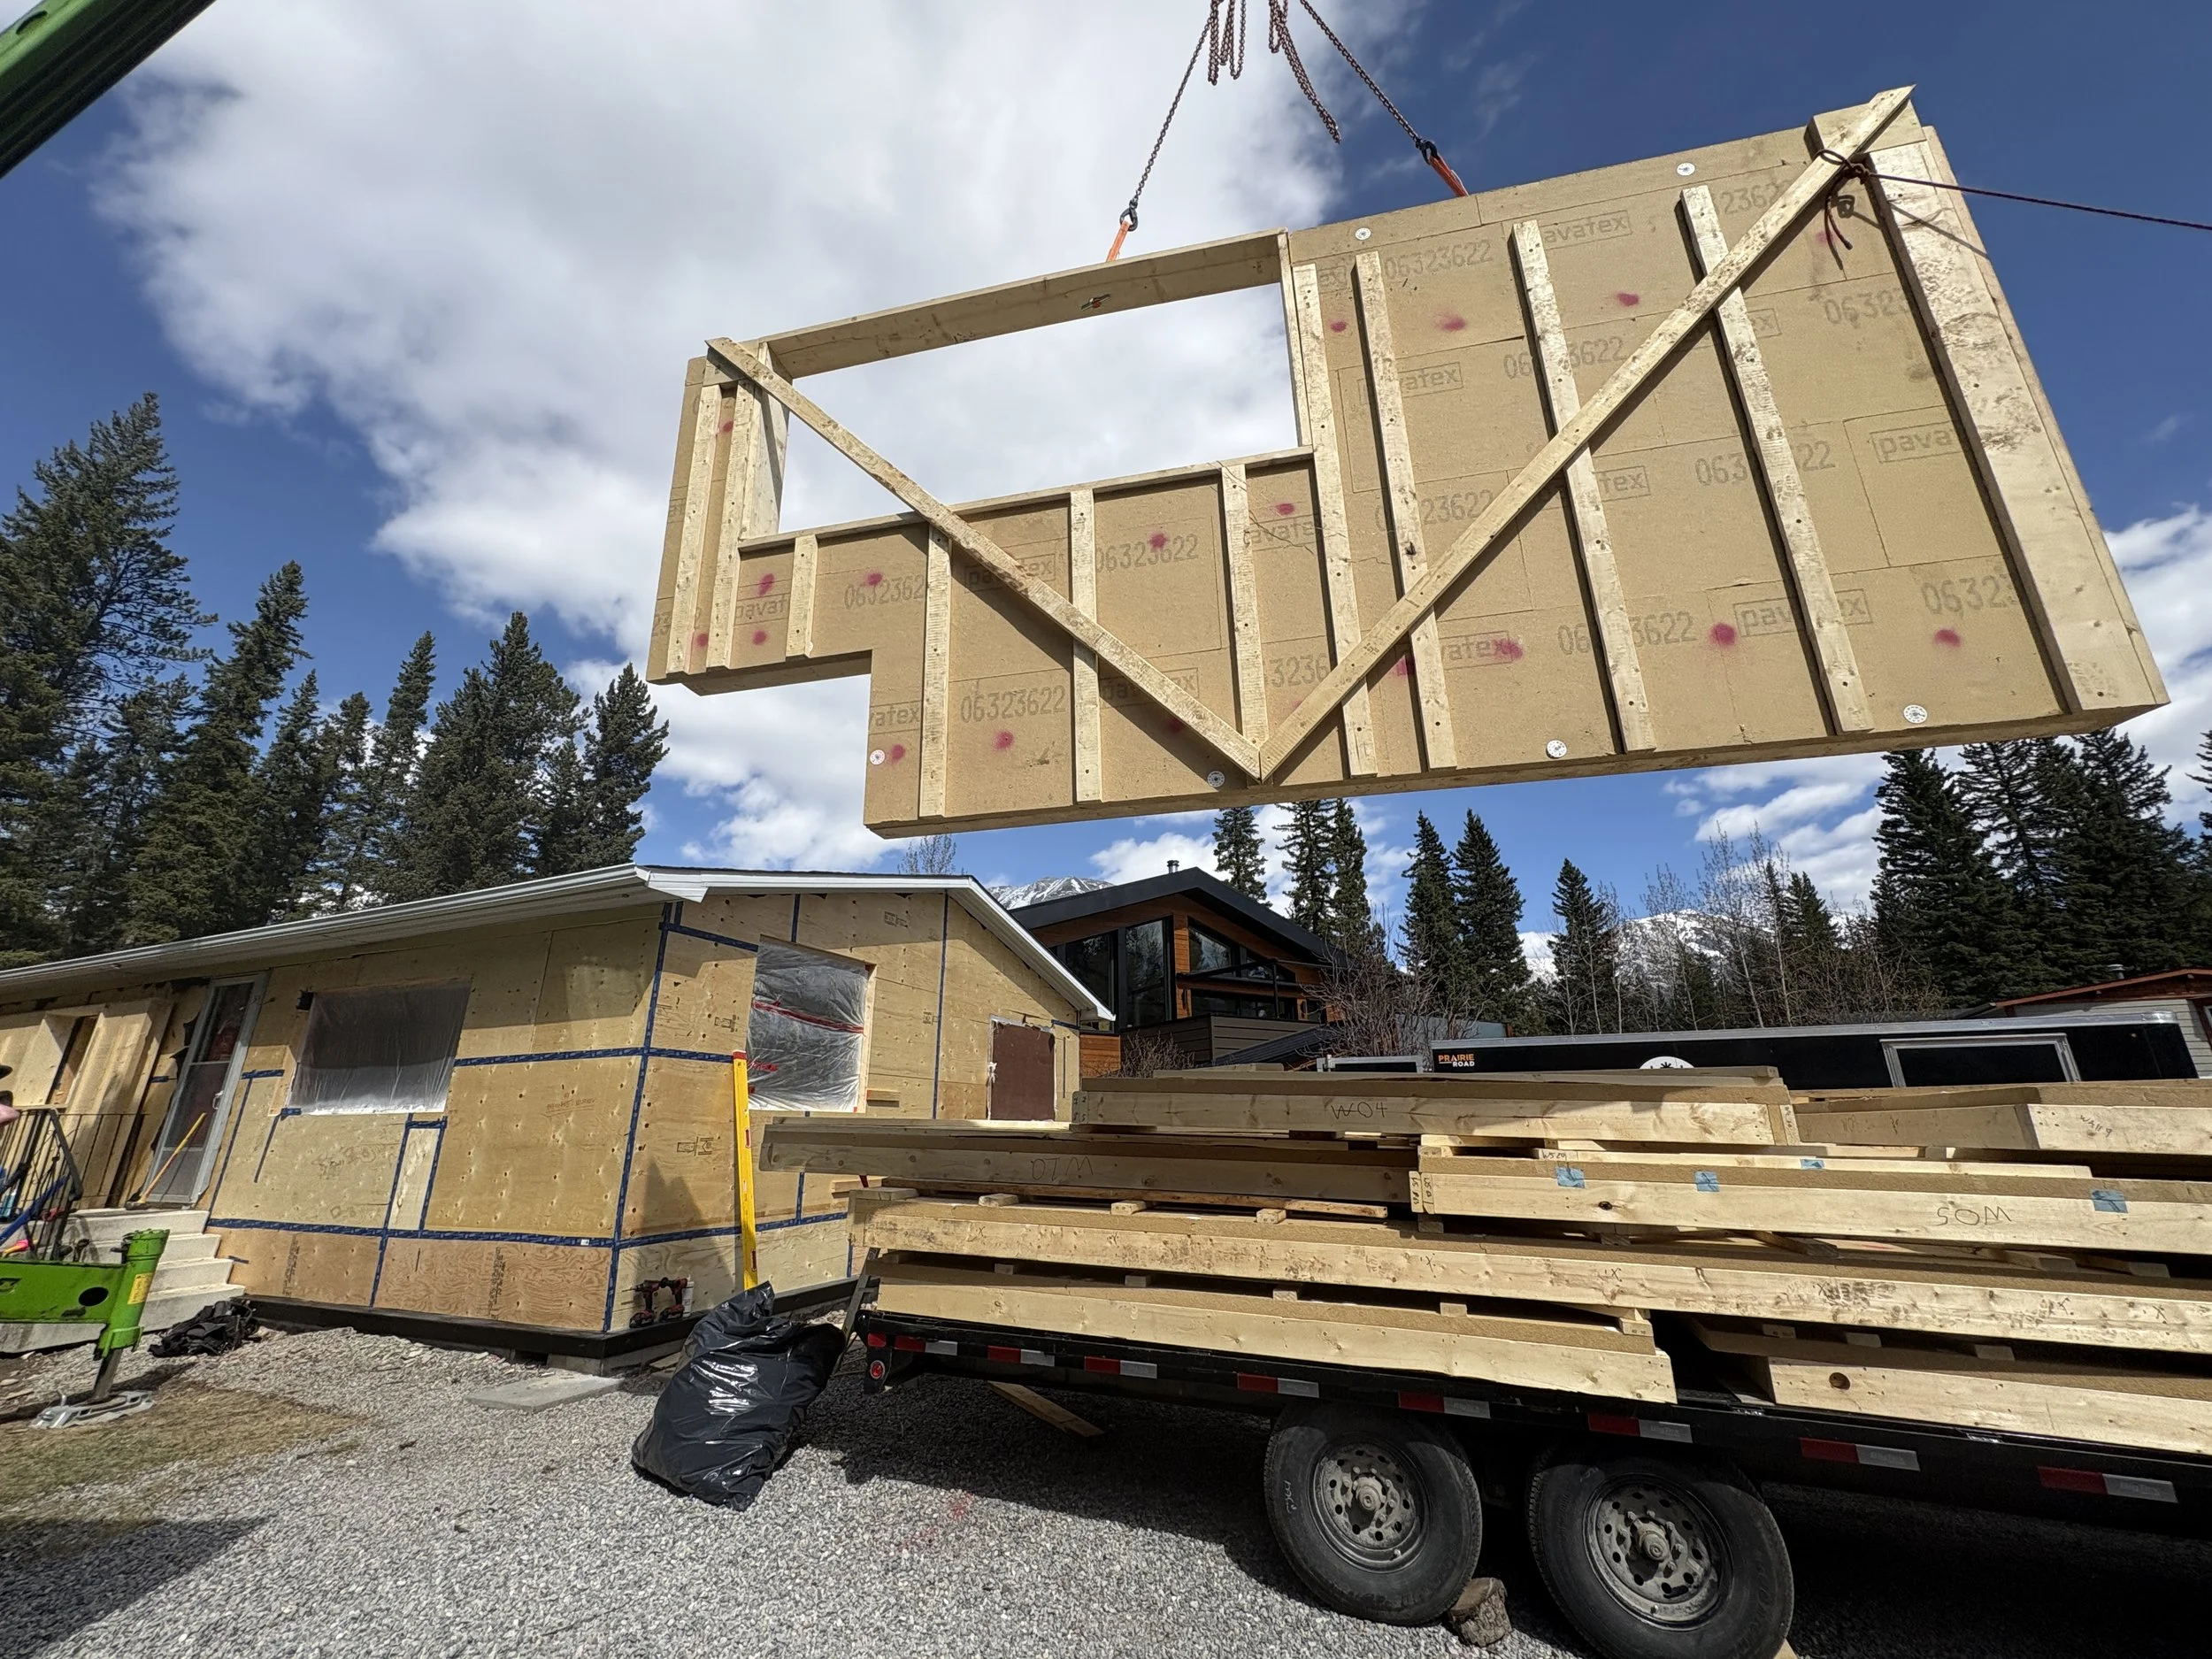
Pictured: Using crane to place PEER panels on the house
With preparation complete and panels delivered, installation begins.
Using a crane, panels are lifted and placed approximately one inch away from the existing wall sheathing. Window openings are aligned precisely. Window openings are precisely aligned, and the panels are secured at the top and bottom.
Thanks to prefabrication, this step moves quickly.
Step 6: Finishing the Exterior Envelope
Pictured: Blowing in the wood fiber into the cavities of PEER panels
Once the panels are in place:
New windows and doors are installed (typically centered in the wall for performance).
Wall insulation is extended up to the soffits and tied into attic insulation.
Foundation insulation can also be installed several feet below grade to reduce heat loss.
The panels are then filled with dense-packed wood fibre insulation using a machine that blows the material through hoses into the panel cavities. The fibre completely fills the cavity, adding R-24 to R-33 to the wall assembly, dramatically reducing indoor noise and improving thermal performance.
If the attic is accessible, this is an ideal time to add loose-fill wood fibre insulation on top of existing insulation. Since the roof is a major source of heat loss, this is a low-cost, high-impact upgrade - provided proper attic ventilation is maintained.
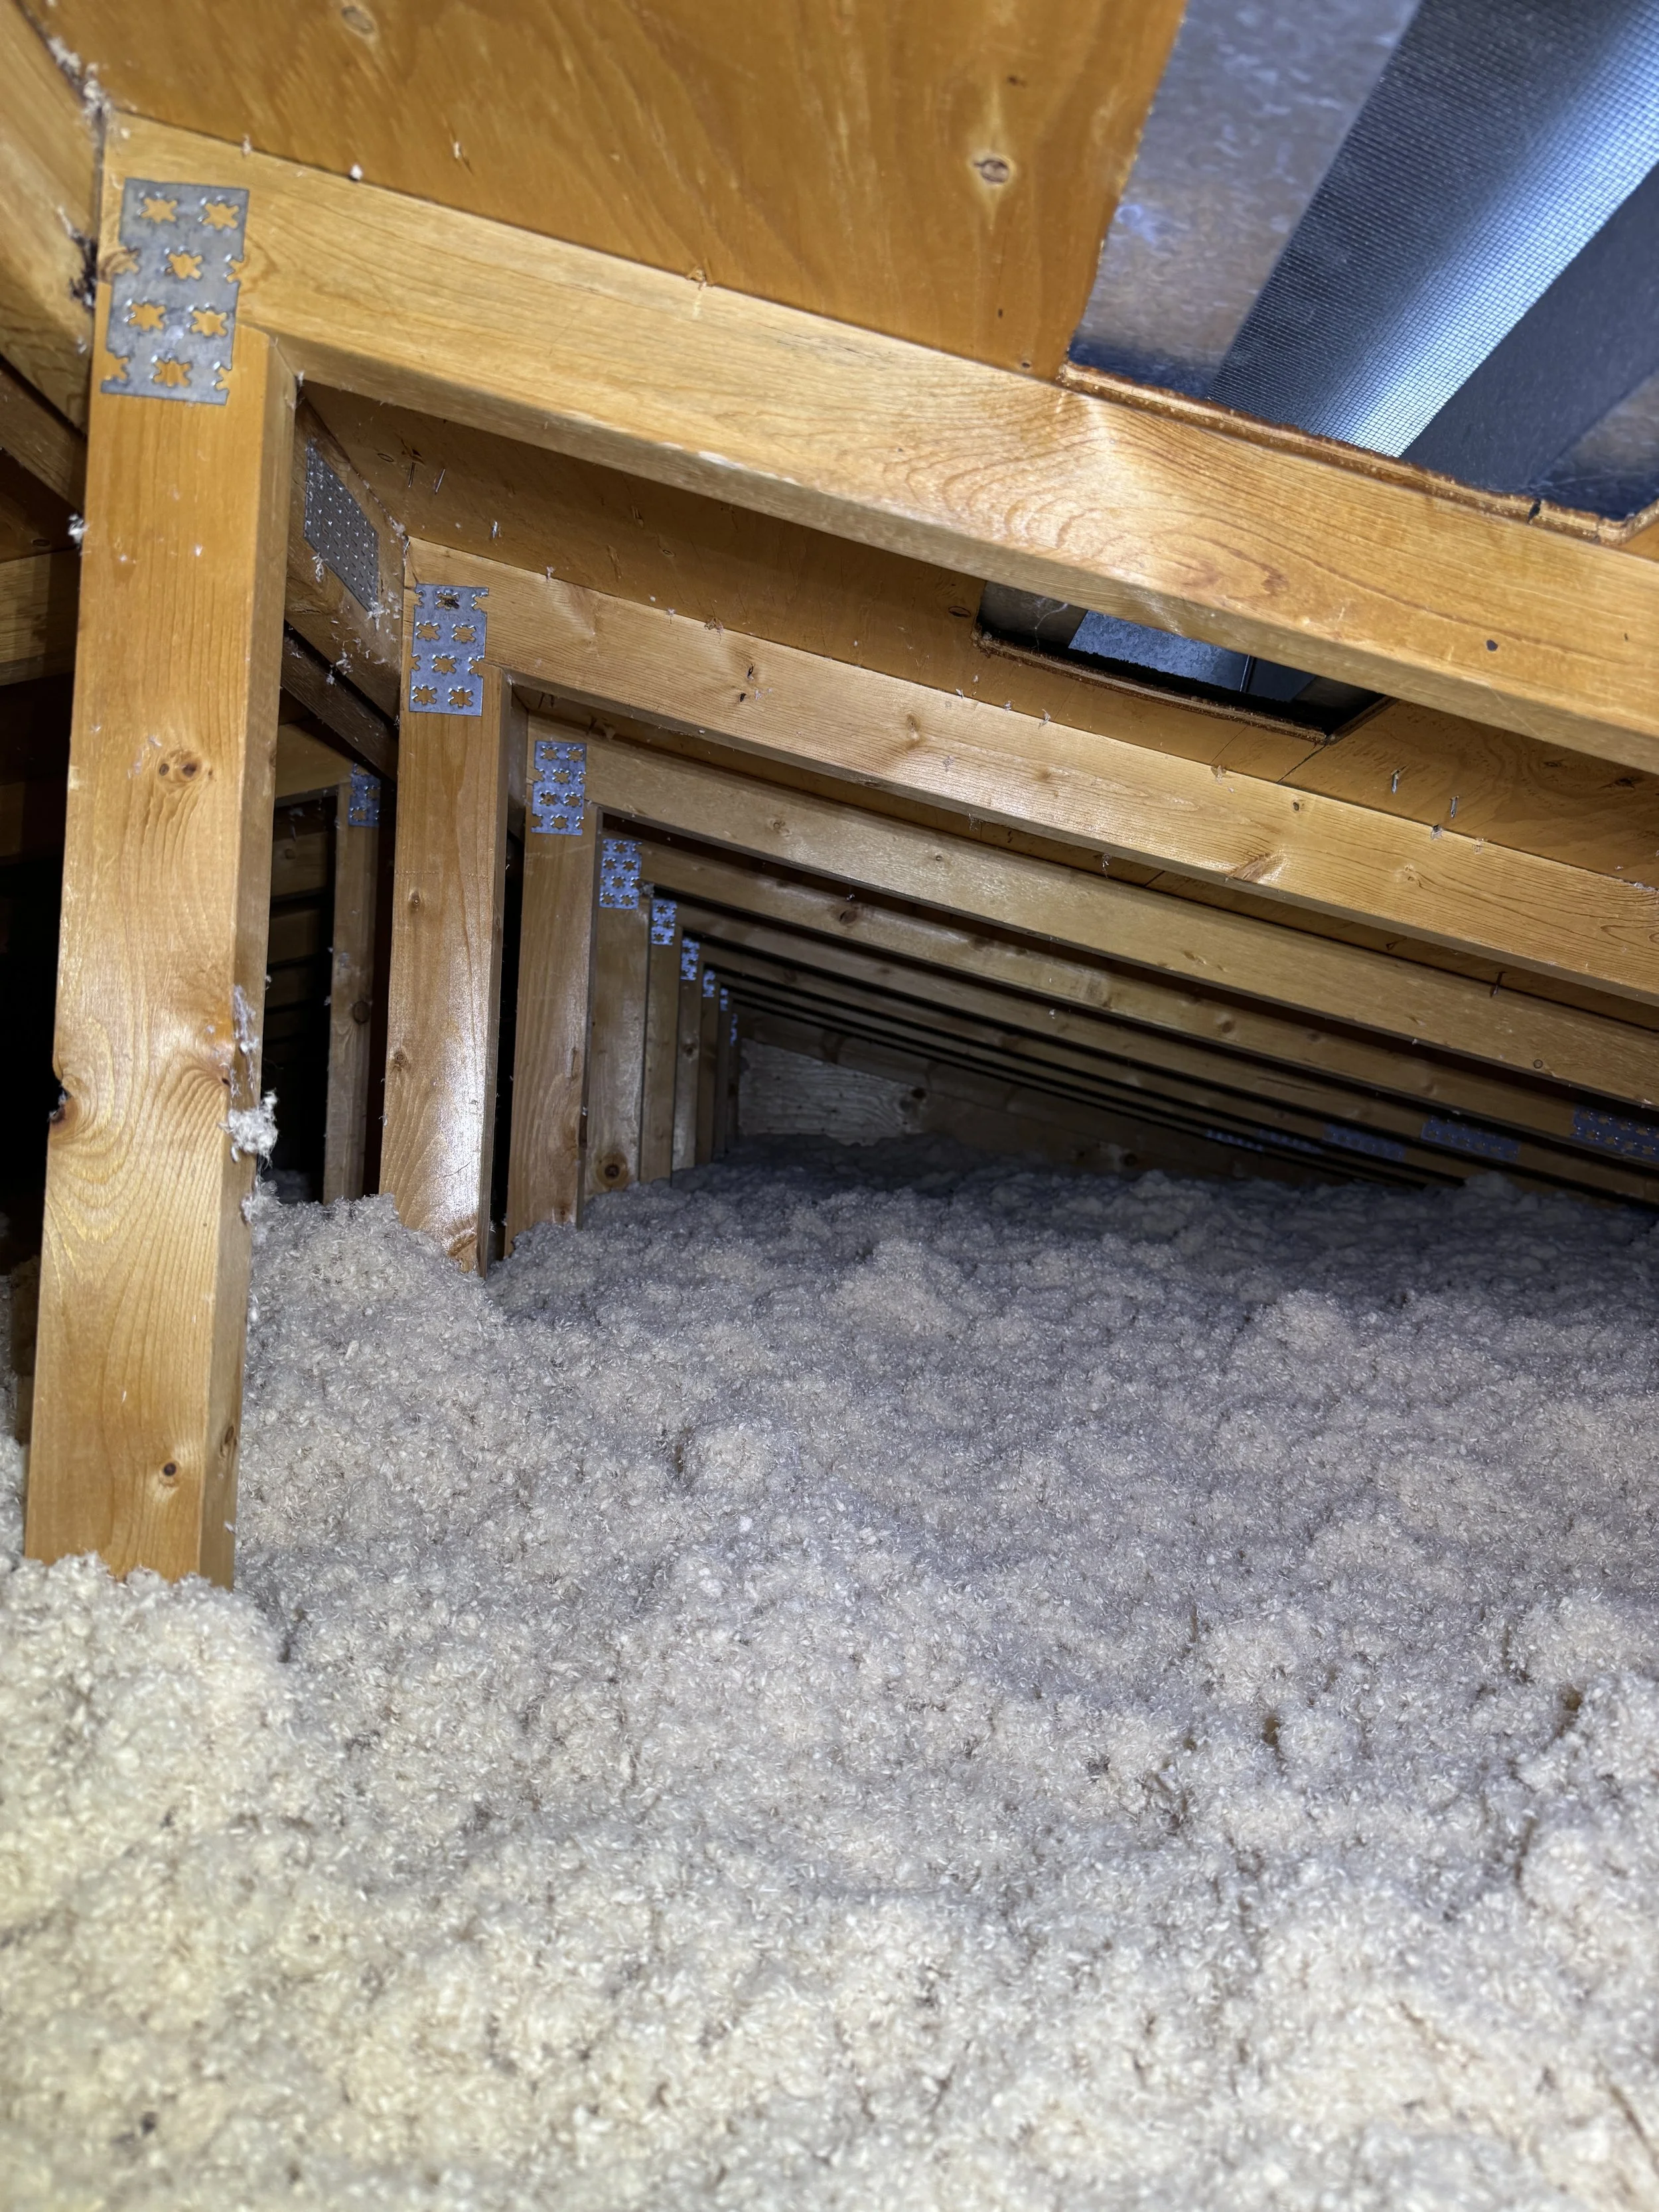
Pictured: Adding extra insulation to the attic space can go a long way
Step 7: Installing the New Siding
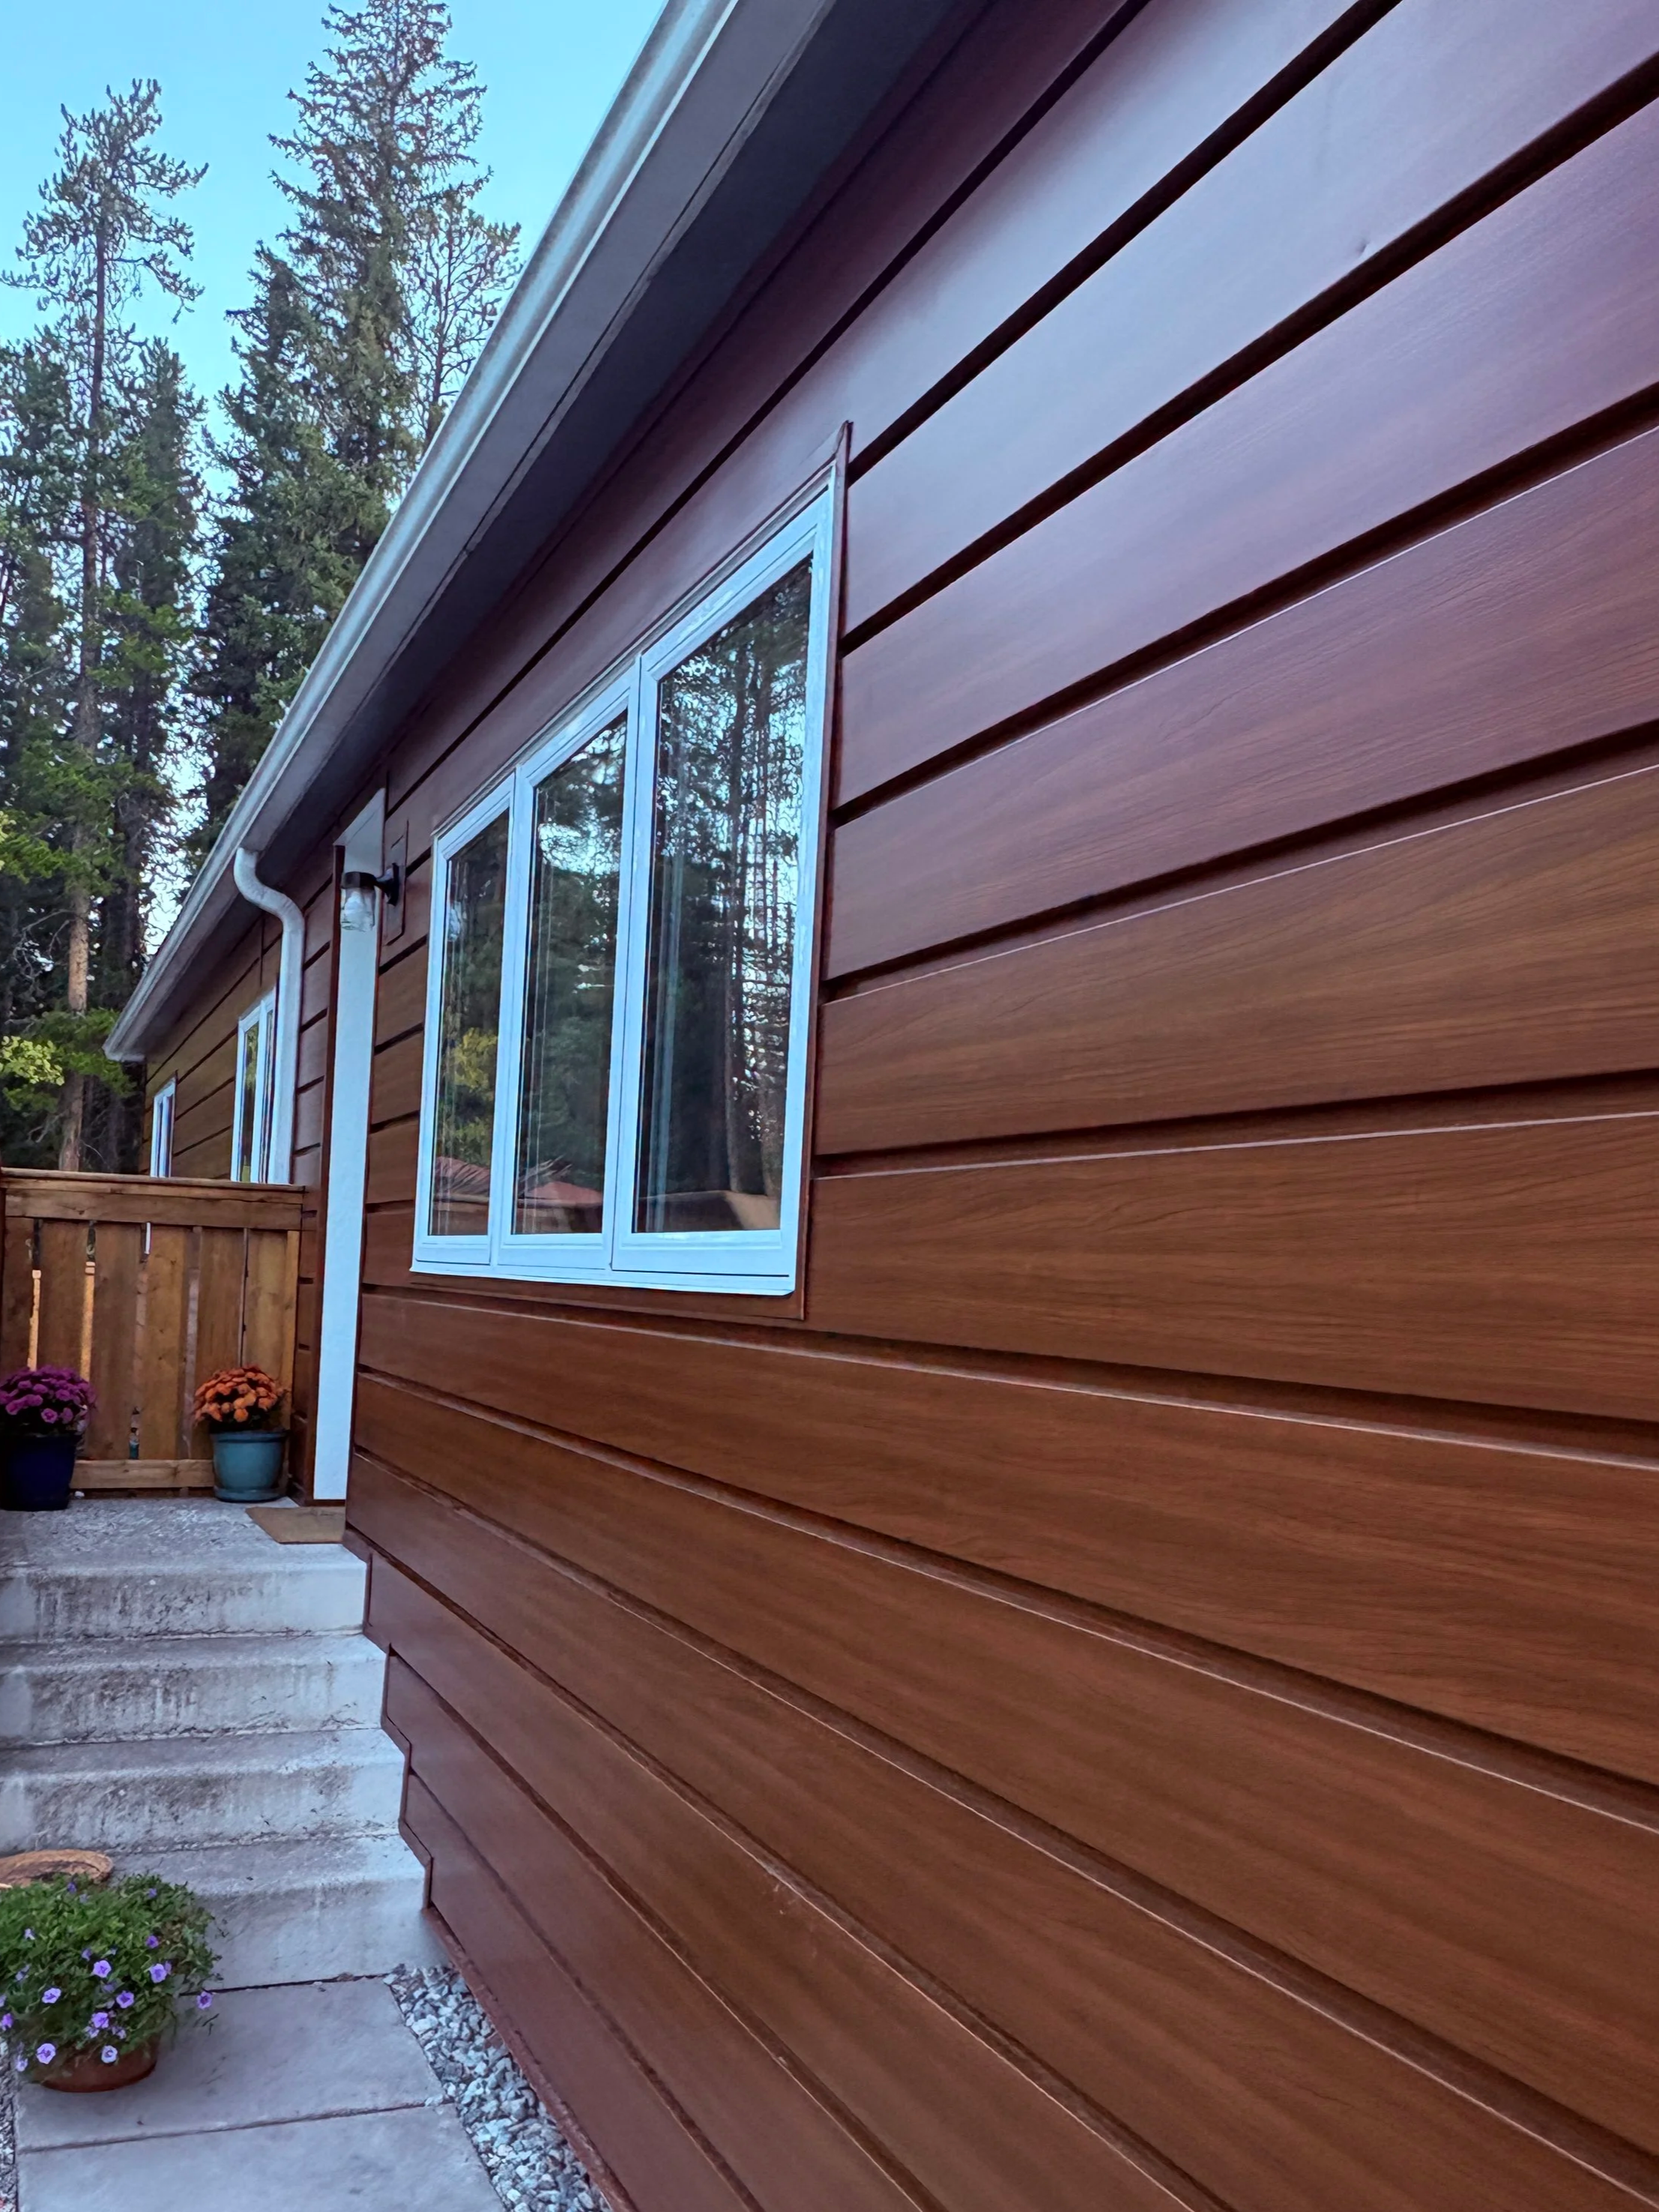
Pictured: PEER retrofit after new siding application
The final step is installing new siding onto the vented rainscreen. This allows moisture to escape to the exterior and ensures the house remains mold free, durable, and resilient for decades to come.
Whether homeowners choose a simple or high-end finish, even a basic Prefabricated Exterior Energy Retrofit (PEER) upgrade delivers significant improvements in:
Energy use (up to 50% reduction)
Indoor comfort
Soundproofing
Aesthetic appeal
While research is ongoing to identify and validate the most effective technical solutions for reducing household energy costs, improving building performance, and decreasing fossil fuel consumption, current findings demonstrate that the Prefabricated Exterior Energy Retrofit (PEER) is a highly effective strategy for significantly enhancing residential energy efficiency. When integrated with high-efficiency heating and domestic hot water systems, the installation of a heat recovery ventilator (HRV), removal of the gas connection and full electrification of the building, and on-site renewable energy generation such as solar PV, a residential building can achieve net-zero energy performance, thus further reducing greenhouse gas emissions.